
SwitchyOmega Setup Guide: Easily Manage Multiple Proxies in Chrome & Firefox
Managing several proxy settings for several tasks, tools, or accounts can be a huge time-waster — particularly if you are doing this manually. That’s where SwitchyOmega steps in: a free browser extension that reduces proxy management to a two-click affair. Whether you are managing social media campaigns, web scraping initiatives, or just need additional online anonymity, SwitchyOmega provides a tidy, user-friendly interface for switching proxy profiles without needing to tinker with complicated settings. In this guide, you’ll discover how to download, install, and maximize the potential of this handy tool.
Key Takeaways:
- Learn what SwitchyOmega is and why it’s useful for proxy management.
- Get step-by-step instructions for installing it on Chrome and Firefox.
- Create and configure multiple proxy profiles with ease.
- Discover tips to streamline your workflow using rules and auto-switching.
What Is SwitchyOmega?
SwitchyOmega is a browser extension for Firefox and Chrome that helps you control multiple proxy configurations from a single location. Rather than manually changing network settings each time you want to use a different proxy, SwitchyOmega lets you define your own profiles and switch between them in an instant. It’s something that will appeal to the efficiency-minded — digital advertisers, data web scrapers, and privacy-minded browsers, for instance.
With its user-friendly interface and the ability to customize the setup options, SwitchyOmega reduces what was once a tedious task into an easy-to-manage task.
Why Use a Proxy Switcher?
If you’re dealing with more than one IP address on a daily basis—whether for account management, data scraping, or accessing geographically restricted content —a proxy switcher such as SwitchyOmega will halve your time and mistakes. Rather than reconfiguring your browser settings every time you switch tasks, a proxy switcher allows you to switch between profiles with a single click.
It also safeguards your anonymity, minimizes the threat of bans or blocks, and streamlines connection speeds by task or geography. For working professionals who depend on agility and privacy, this tool is not just useful — it’s indispensable.
Key Features of SwitchyOmega
SwitchyOmega offers a set of practical features that make managing proxies efficient and user-friendly:
- Multiple Profiles: Create and save distinct proxy profiles — each with its own server, port, and authentication info. Perfect for switching between work, personal, or automation tasks.
- Rule-Based Switching: Set up rules so specific URLs or domains automatically trigger a selected proxy profile. Great for power users managing complex workflows.
- Quick Switching Menu: Access and switch between proxy profiles directly from your browser toolbar in just one click.
- Authentication Support: Easily handle proxies that require login credentials using built-in username/password fields or IP whitelisting.
These features make SwitchyOmega ideal for users who value both control and convenience.
How to Install SwitchyOmega
Installing SwitchyOmega is quick and straightforward, whether you’re using Chrome or Firefox. The extension is available through each browser’s official add-on store, making it safe to download and easy to keep updated. Once added, you’ll be able to configure and manage proxies directly from your browser — no need to dig into system settings or third-party software.
Here’s how to install it step by step:
For Google Chrome:
- Open the Chrome Web Store.
- Search for SwitchyOmega using the search bar.
- Click Add to Chrome, then confirm by selecting Add Extension when prompted.
- After installation, the SwitchyOmega icon will appear in your browser’s extensions bar.
For Mozilla Firefox:
- Go to the Firefox Add-ons site.
- Type SwitchyOmega in the search field.
- Click Add to Firefox and approve the permissions when asked.
- The extension icon will now be visible near your address bar.
After installation, click the SwitchyOmega icon and select Options to start configuring your proxy profiles. You’re now ready to take control of your browser’s network traffic with just a few clicks.
Setting Up Your First Proxy Profile
Now that SwitchyOmega is installed, it’s time to create your first proxy profile. This is where you input your proxy server details — such as IP address, port number, and login credentials — so you can switch to it instantly whenever needed.
Follow these steps to set it up:
- Open SwitchyOmega by clicking its icon in your browser, then select Options.
- In the left-hand menu, click “New Profile.”
- Name your profile something descriptive (e.g., “Social Media Proxy” or “Work Proxy”).
- Choose “Proxy” as the profile type and click Create.
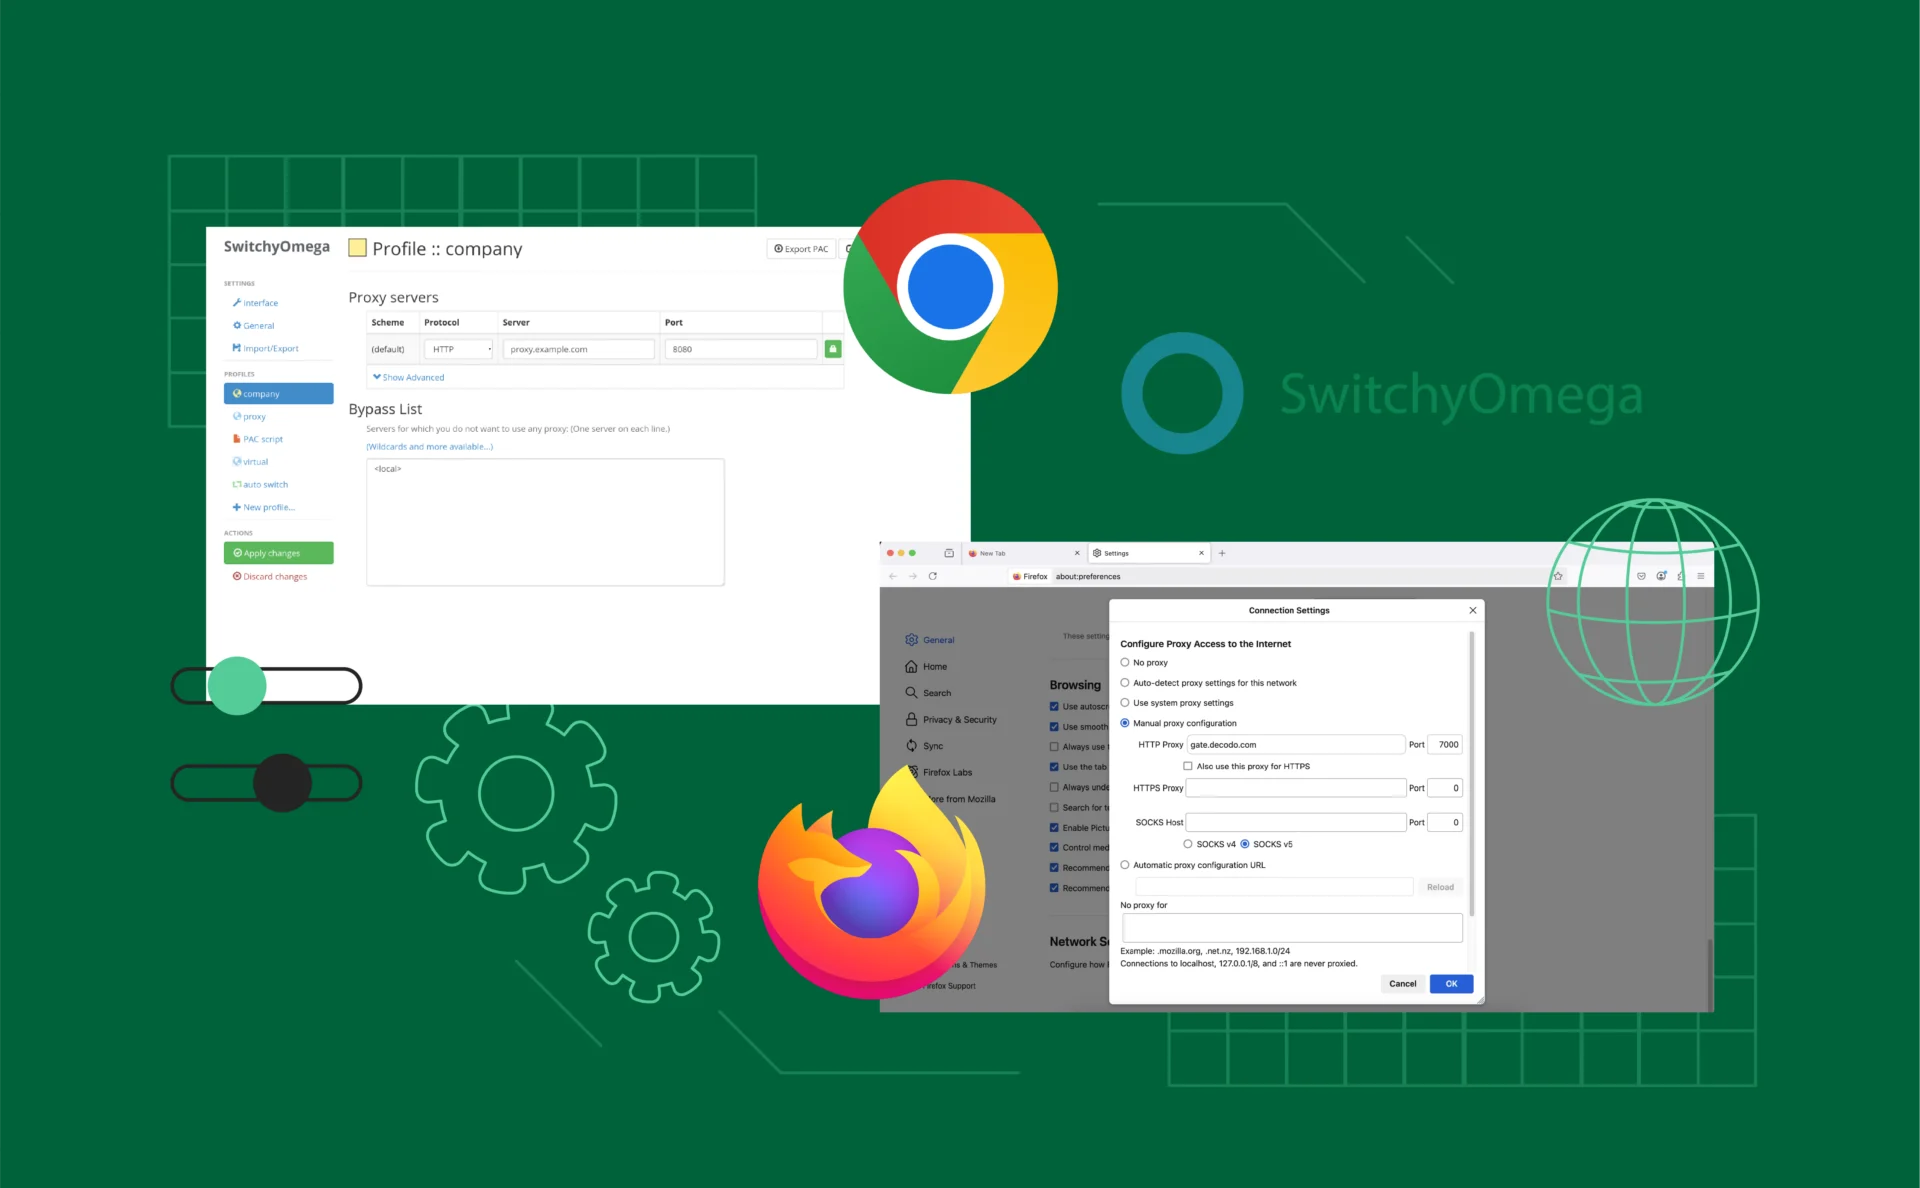
- On the configuration page, select your proxy type (HTTP, HTTPS, or SOCKS5), then enter the server address and port number.
- If your proxy requires authentication, click the lock icon and input your username and password.
- Click Save Changes, then hit Apply Changes to activate the profile.
Once set, your proxy profile is ready to use at any time with just one click from the extension menu.
Switching Between Proxy Profiles
Once you’ve set up one or more proxy profiles in SwitchyOmega, switching between them is incredibly easy — and that’s where this tool really shines. Instead of digging into your browser’s network settings, you can toggle between proxies in seconds.
Here’s how:
- Click the SwitchyOmega icon in your browser’s extension bar.
- You’ll see a list of all the profiles you’ve created.
- Simply click on the profile you want to activate. That’s it — your browser will now route traffic through the selected proxy.
- To go back to your regular connection, select “Direct” from the same menu.
This fast switching is ideal for users managing different tasks — like handling multiple client accounts, switching between geo-locations, or testing website behavior from different IPs.
Creating Rules for Auto-Switching
If you’re juggling multiple tasks or domains that each require a specific proxy, manual switching can become tedious. That’s where SwitchyOmega’s rule-based switching comes in. It lets you automate which proxy profile is used based on the URL or domain you’re visiting—saving you clicks and avoiding mistakes.
Here’s how to set it up:
- Open SwitchyOmega Options, then click “Auto Switch” in the left menu.
- Click “New Rule List” or start editing the default one.
- Enter a condition — for example, if the URL contains facebook.com — and assign it to a specific proxy profile.
- Repeat for as many domains or rules as needed.
- Once done, click Apply Changes, and make sure the Auto Switch profile is active.
Now, every time you visit a site covered by your rules, SwitchyOmega will automatically route the traffic through the correct proxy — no manual toggling required.
Tips for Using SwitchyOmega Effectively
To get the most out of SwitchyOmega, here are some practical tips and best practices:
- Use Clear Profile Names: Name your proxy profiles descriptively (e.g., “US Social Media” or “EU Scraper”) to avoid confusion when switching.
- Keep Your Proxies Updated: Make sure your proxy server details and credentials are current to prevent connection errors.
- Test Proxies Regularly: Periodically check that your proxies are working and fast enough for your needs—slow or dead proxies can disrupt your workflow.
- Leverage Auto-Switching Rules: Automate your proxy usage with rules to save time and reduce mistakes, especially when working with multiple accounts or domains.
- Avoid Free Proxies: Free proxies tend to be unreliable and insecure. Investing in quality residential or dedicated proxies will ensure better speed, stability, and privacy.
- Backup Your Profiles: Export your SwitchyOmega profiles regularly to save your settings in case of browser resets or reinstallations.
Following these tips will help you maintain a smooth, efficient proxy experience.
Conclusion
SwitchyOmega is a versatile and easy-to-use tool that simplifies managing multiple proxy servers directly from your browser. It allows users to quickly switch between different proxy profiles, making tasks like handling multiple accounts, web scraping, or enhancing privacy more efficient. While the extension streamlines proxy management, the overall experience still depends on the quality and reliability of the proxies being used. Proper configuration combined with good proxies can help ensure a smooth and effective browsing experience.