
Proxy Helper Guide: Full Setup and Configuration
Chrome doesn’t let you manage proxies on its own — it relies on your system settings instead. Proxy Helper solves that limitation by letting you control proxy connections from inside the browser itself. It’s fast, direct, and ideal for anyone who needs to work with multiple proxies without touching system configurations.
What is Proxy Helper?
Proxy Helper is a Chrome extension that lets you manage proxy settings directly in your browser. It supports various proxy types, including HTTP, HTTPS, SOCKS4, and SOCKS5, and allows you to set up multiple proxy profiles, switch between them quickly, and add authentication if needed.
Unlike system-level proxy tools, Proxy Helper isolates proxy traffic to Chrome only. That means you can use a proxy for web tasks without affecting other applications on your computer — useful for testing, research, or browsing with location control.
It also supports PAC scripts for automatic proxy selection and includes features like bypass lists and traffic targeting. Despite its simplicity, it’s flexible enough for more advanced setups.
Why use Proxy Helper in Google Chrome?
Chrome doesn’t offer built-in proxy management — it depends entirely on your system’s network settings. This makes switching proxies inconvenient, especially if you only want browser traffic to route through a specific IP.
Proxy Helper fixes that by adding proxy control directly to Chrome. You can configure different proxy profiles, apply them instantly, and avoid affecting your internet connection outside the browser. It’s especially useful if you’re handling sensitive tasks, accessing region-locked content, or testing websites under different IPs.
You also get features like authentication, PAC script support, and bypass lists, all from a simple interface. For most use cases, Proxy Helper offers just enough control without needing more complex software.
How do you install Proxy Helper?
Installing Proxy Helper is quick and doesn’t require any system changes. Just follow these steps:
- Open the Chrome Web Store and search for “Proxy Helper.”
- Click Add to Chrome, then confirm by selecting Add extension in the pop-up.
- After installation, click the puzzle icon in your browser’s toolbar. Find Proxy Helper and click the pin icon to keep it visible for easy access.
Once pinned, the Proxy Helper icon appears next to your address bar. From there, you can configure your proxies, switch modes, and manage settings — all without leaving your browser.
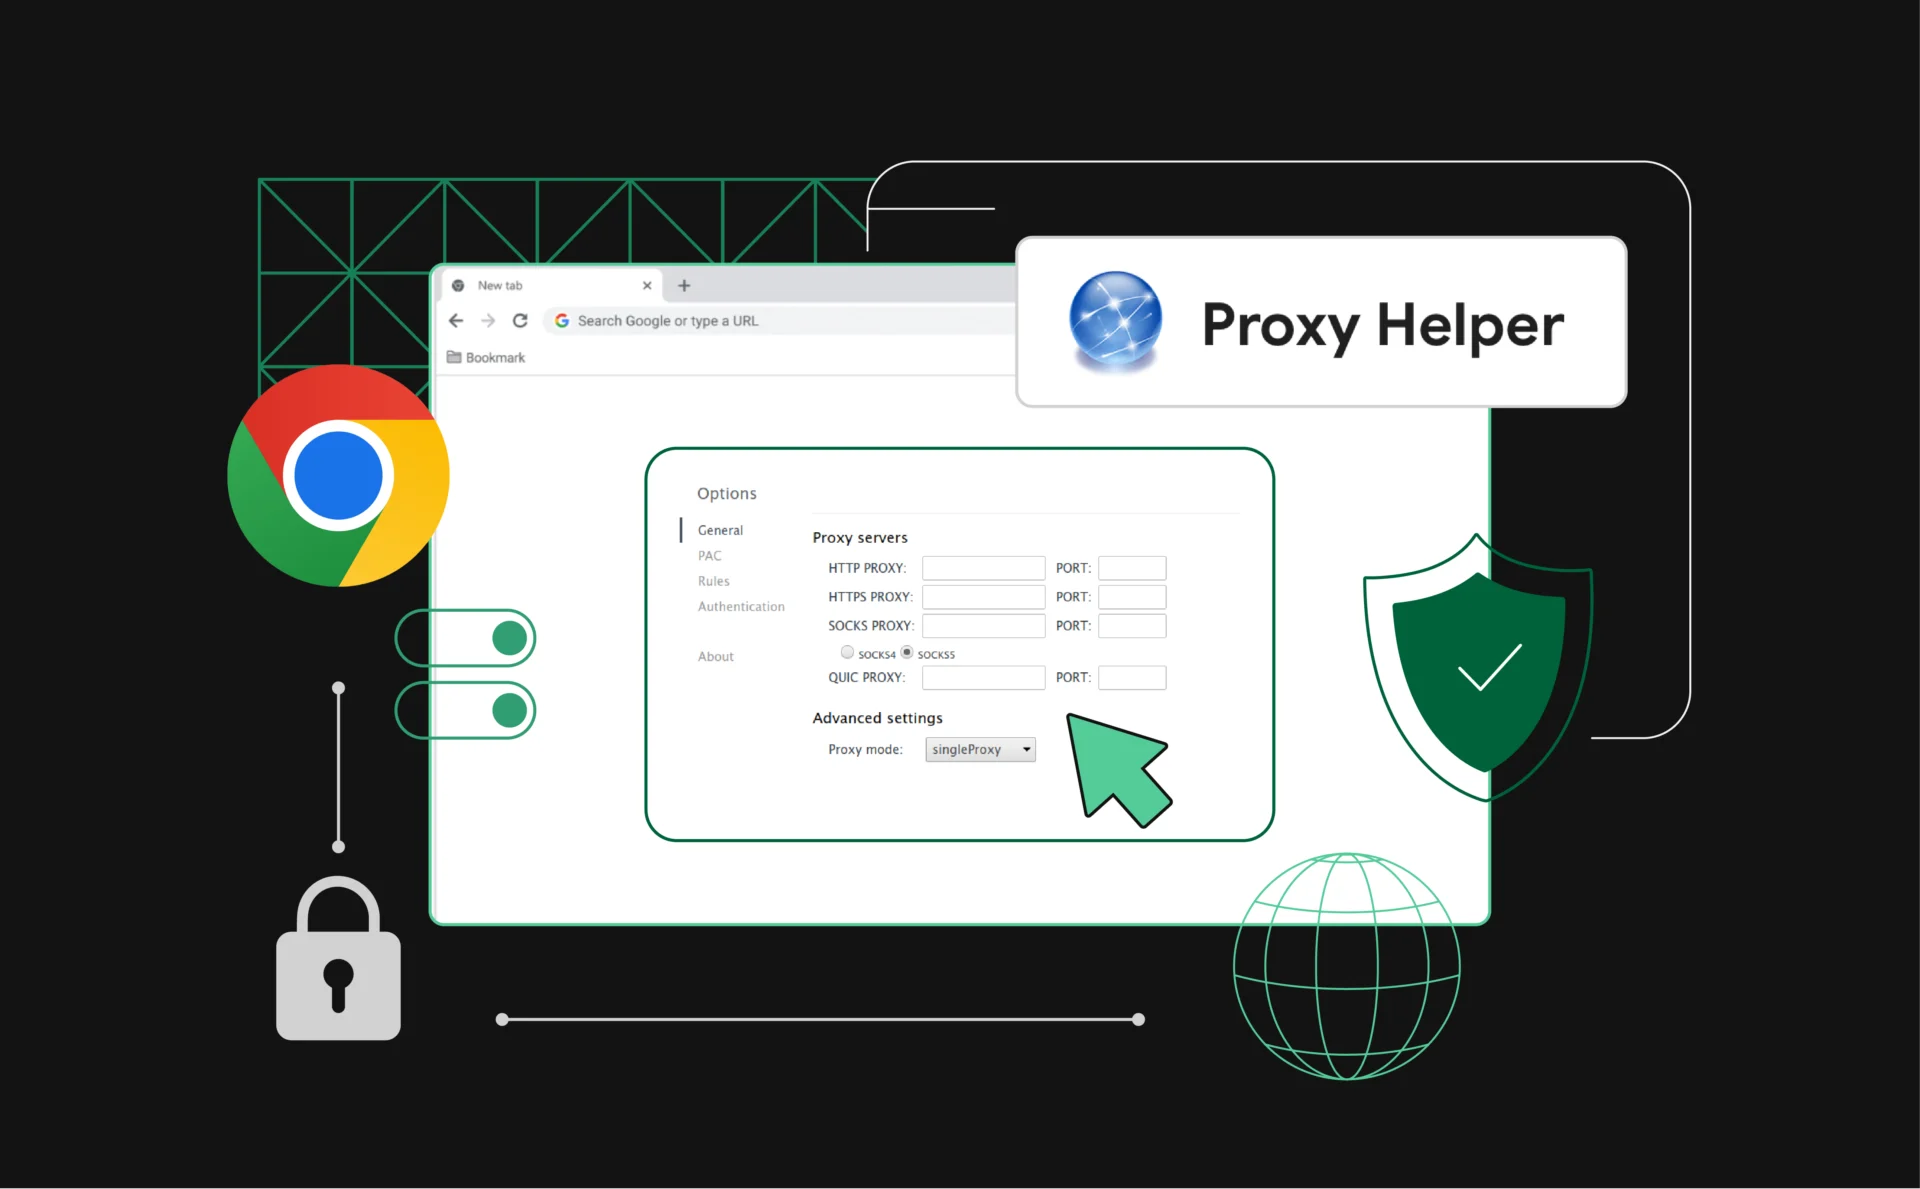
How do you add a proxy server in Proxy Helper?
To add a proxy server in Proxy Helper, you’ll need the server details provided by your proxy service — including the IP address, port number, and protocol type.
Follow these steps:
- Right-click the Proxy Helper icon in Chrome and select Options.
- In the Proxy Server section, enter the following:
- The proxy server’s IP address
- The correct port number
- The protocol type — HTTP, HTTPS, SOCKS4, or SOCKS5
- Save the configuration or close the menu — changes are applied automatically.
After setup, click the Proxy Helper icon and select the profile you just created. All browser traffic in Chrome will now be routed through the configured proxy server.
How do you set up proxy authentication in Proxy Helper?
If your proxy requires a username and password — which is common with private or paid services — Proxy Helper supports basic authentication directly in its settings.
Here’s how to set it up:
- Right-click the Proxy Helper icon and select Options.
- Navigate to the Authentication tab.
- Enter your username and password exactly as provided by your proxy service.
- Save your settings or close the menu — the extension will apply them automatically.
Once authentication is configured, Proxy Helper will use these credentials whenever it connects to the proxy server. Make sure the login information is accurate — even small typos will cause the connection to fail.
What are PAC scripts and how do you use them?
PAC (Proxy Auto-Configuration) scripts allow Proxy Helper to automatically decide which proxy to use based on the websites you visit. This is useful if you want certain domains to use a proxy while letting others connect directly.
To use a PAC script in Proxy Helper:
- Right-click the extension icon and open Options.
- Navigate to the PAC Script section.
- Enter a remote PAC script URL or upload a local PAC file from your computer.
- Save your changes — the extension will follow the rules defined in the script.
A PAC script is just a JavaScript file with logic that tells the browser when and how to apply proxy settings. This is ideal for workflows that need automated routing without constant switching.
How do you use bypass lists in Proxy Helper?
Bypass lists in Proxy Helper let you define specific websites or domains that should skip the proxy connection and load using your regular internet connection. This feature is useful for sites that don’t work well with proxies or don’t need one at all.
To set up a bypass list:
- Open the Proxy Helper Options.
- Go to the Bypass List or Advanced Settings section.
- Enter the domains you want to exclude — one per line.
Once saved, any domain on the list will bypass the proxy, even if a proxy profile is active. This is effectively split tunneling for your browser — useful when you want to route only specific traffic through a proxy.
What should you do if Proxy Helper isn’t working?
If Proxy Helper isn’t connecting properly or your proxy isn’t functioning as expected, there are a few things to check before assuming something’s broken.
1. Double-check your proxy details
Make sure the IP address, port, and protocol match exactly what was provided. A typo in any of these will prevent the connection.
2. Confirm authentication settings
If your proxy requires a username and password, ensure they’re entered correctly in the Authentication tab — no extra spaces or missing characters.
3. Make sure the proxy is online
Test the proxy server separately in another tool or browser to verify it’s up and responding.
4. Avoid conflicts with other tools
Don’t run Proxy Helper alongside another proxy extension or VPN. These tools can interfere with each other and block traffic.
5. Try a fresh reinstall
Remove the extension from Chrome, restart the browser, and reinstall it from the Chrome Web Store.
If it still doesn’t work, try testing with a different proxy entirely — the problem may not be with Proxy Helper, but with the server itself.
What proxies work best with Proxy Helper?
Proxy Helper supports multiple proxy types, but not all are equally suited to every task. The best choice depends on what you’re using the proxy for.
Residential proxies
These are ideal for browsing, unblocking region-locked content, or tasks that need to appear like normal user traffic. They’re less likely to get flagged or blocked and work well with Proxy Helper.
Datacenter proxies
Faster and more affordable, datacenter proxies are good for general use, like testing or scraping, where speed matters more than stealth. Just make sure your target sites don’t detect and block them.
SOCKS proxies
For more flexible routing, SOCKS4 and SOCKS5 proxies are fully supported. They’re useful for advanced users, especially when combined with authentication or PAC scripts.
HTTPS proxies
Best for simple setups. They’re easy to configure, widely supported, and secure enough for most browsing needs.
The key is using reliable, clean proxies — avoid free lists or overloaded IPs. Proxy Helper will do its job, but only as well as the proxies you connect to.
Conclusion
Proxy Helper offers just the right balance of simplicity and control for managing proxies in Chrome. It’s lightweight, easy to set up, and flexible enough for both casual users and more advanced configurations like PAC scripts and bypass lists.
If you need browser-level proxy management without touching system settings, this extension delivers. Just pair it with reliable proxy servers, and it’ll handle the rest without getting in your way.