

How to Fix “localhost refused to connect.” on Windows & Mac
You think “localhost refused to connect.” means your browser is broken. Most of the time, it does not!
The scary part is that your browser may be telling the truth. It tried to reach your local server, but nothing answered. Or something answered from the wrong place. Or your proxy, firewall, port, app, Docker setup, or browser profile quietly got in the way.
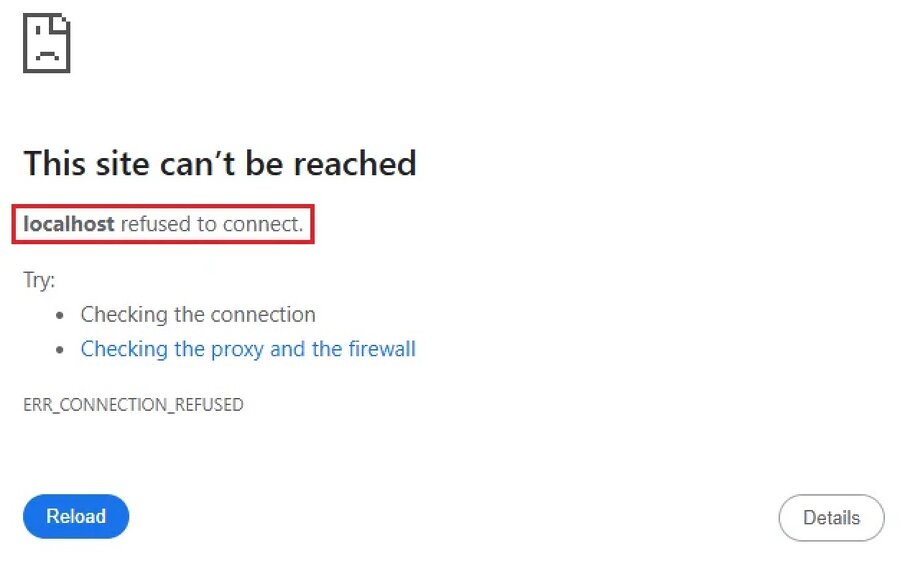
That is why this error feels confusing. You can have the right project, the right URL, and the right code – yet still see:
“This site can’t be reached.” or “localhost refused to connect.”
=> The good news: this error is usually fixable in minutes once you stop guessing.
This guide explains what the error really means, how to fix it on Windows and Mac, and how to test whether your browser, proxy, or fingerprint setup is interfering with local development.
Before scaling any multi-account or mobile-account workflow, tools like Pixelscan can help you check whether your browser environment is leaking suspicious signals, while Multilogin cloud phones can help teams separate mobile account environments instead of mixing everything inside one messy local setup.
What does “localhost refused to connect.” mean?
Localhost points back to your own computer. When you open http://localhost:3000, your browser is not going to the public internet. It is asking your own machine:
“Is there a server running on port 3000?”
If nothing is listening on that port, your browser refuses the connection. That is where the error comes from.
In plain English, “localhost refused to connect.” means your browser reached your computer, but the local service you expected was not available.
This often happens when:
- Your local server is not running
- You opened the wrong port
- The app crashed after starting
- Another app is using the same port
- Firewall or antivirus blocked the connection
- A proxy or VPN is routing localhost incorrectly
- Docker, Node.js, XAMPP, MAMP, Laravel, Python, or another dev tool is misconfigured
The key idea is simple: this is not always a browser issue. It is usually a connection issue between your browser and your local environment.
Test yourself: is your browser or local server the problem?
Before changing random settings, run this quick test.
Open your browser and try these URLs one by one:
- http://localhost:3000
- http://127.0.0.1:3000
- http://localhost:8080
- http://127.0.0.1:8080
Replace 3000 or 8080 with the port your app is supposed to use.
If 127.0.0.1 works but localhost does not, your hosts file, DNS resolution, IPv6, or browser routing may be involved.
If neither works, your server is probably not running, not listening on that port, or being blocked.
If one browser works and another does not, check browser proxy settings, extensions, privacy tools, or separate browser profiles.
After fixing localhost, run a quick browser test on Pixelscan to see whether your browser setup exposes proxy, IP, fingerprint, DNS, or automation-related signals. This is especially useful if you manage multiple accounts or test automation environments.
=> Looking for a more secure setup for managing multiple Snapchat accounts? This guide covers the key checks before you expand.
Quick fix: make sure your local server is actually running
This sounds obvious, but it is the most common cause.
Many users open localhost before starting the local app. Others start the app, see one warning in the terminal, ignore it, and then wonder why the browser fails.
If you are using Node.js, go to your project folder and run:
npm install
npm run dev
or:
npm start
If you are using Python, try:
python -m http.server 8000
Then open:
http://localhost:8000
If you are using Laravel, try:
php artisan serve
Then open the URL shown in the terminal, often:
http://127.0.0.1:8000
Don’t guess the port number. Check the message in your Terminal after you start the project. Most frameworks show the exact local URL you should open, such as http://localhost:3000, http://localhost:5173, or http://127.0.0.1:8000. Copy that URL and paste it into your browser. If you open the wrong port, you may still see “localhost refused to connect.” even when your server is running correctly.
Check the port number carefully
A port is like a door. Your computer can run many services at once, but each one needs the correct door number.
If your app is running on port 5173, opening localhost:3000 will fail. If your backend runs on 8000, opening localhost:8080 will also fail.
This is why “localhost refused to connect.” often appears after switching between React, Vite, Next.js, Laravel, WordPress, Docker, or API projects.
Check your terminal for a line like:
Local: http://localhost:5173/
Then open exactly that address.
If the app says the port is already in use, you have two options. You can stop the app using that port, or run your project on a different port.
On Windows, check active ports with:
netstat -ano | findstr :3000
On Mac, use:
lsof -i :3000
If another process is using the port, stop it or change your project’s port configuration.
How to fix “localhost refused to connect.” on windows
Windows adds a few extra places where localhost can break. The issue may come from the app, the port, Windows Defender Firewall, proxy settings, WSL, Docker, or even a recent system update.
Start with the simplest fix: restart your dev server. Close the terminal, reopen it as Administrator, go back to your project folder, and start the app again.
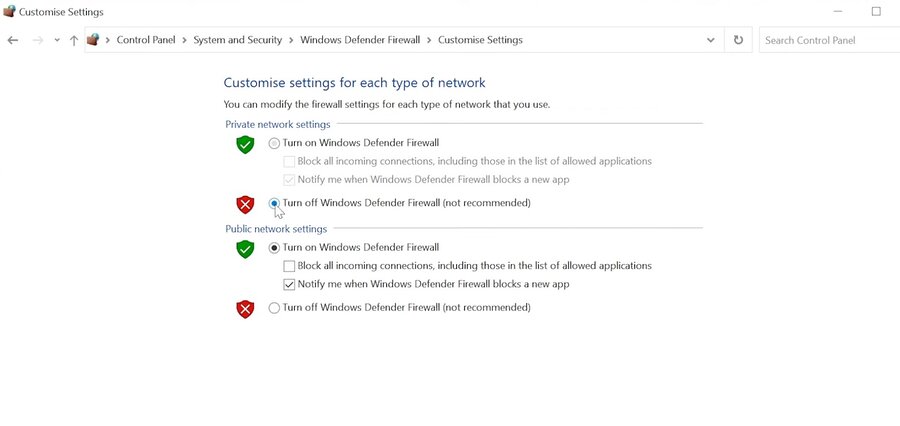
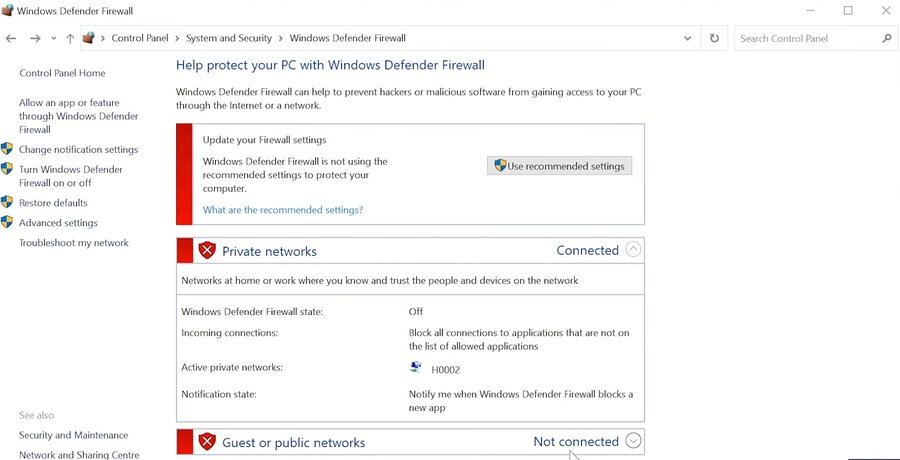
If that fails, check whether Windows is blocking the app. Open Windows Security, go to Firewall & network protection, and allow your development tool through the firewall. This may apply to Node.js, Python, Docker Desktop, Apache, MySQL, Nginx, or your IDE.
Next, check your proxy settings. Go to:
Settings → Network & Internet → Proxy
Turn off proxy settings temporarily, then test localhost again.
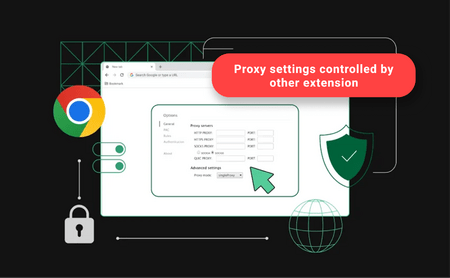
This matters because some proxy tools accidentally route local traffic through a proxy server. Localhost should normally stay local. If your traffic is being redirected, your browser may never reach the server on your own machine.
You should also check the Windows hosts file:
C:\Windows\System32\drivers\etc\hosts
Make sure it contains:
127.0.0.1 localhost
If you use WSL or Docker, remember that localhost can behave differently depending on where the server is running. A server inside a Linux container may need port mapping before Windows can access it.
For Docker, confirm that your container exposes the port:
docker ps
You want to see something like:
0.0.0.0:3000->3000/tcp
If the port is not mapped, your browser cannot reach it from Windows.
How to fix “localhost refused to connect.” on mac
On Mac, this error is often caused by a stopped dev server, a blocked port, a local proxy, or a service conflict.
First, restart your local server from the terminal. Then check whether your app is listening on the expected port:
lsof -i :3000
If nothing appears, no app is listening on that port. Start your server again.
If another process appears, that port is already occupied. Stop the process or run your app on another port.
You can stop a process by using its PID:
kill -9 PID
Replace PID with the actual process ID.
Next, check your Mac proxy settings:
System Settings → Network → Wi-Fi → Details → Proxies
Disable unnecessary proxies and test again.
If you use MAMP, XAMPP, Docker, Laravel Valet, or local WordPress, confirm that Apache or Nginx is actually running. These tools often look active in the UI, but the web server may have failed silently due to a port conflict.
If you changed your hosts file, check:
sudo nano /etc/hosts
You should see:
127.0.0.1 localhost
Save carefully. One wrong character in the hosts file can break local routing.
What people get wrong about localhost
If localhost fails, my internet is broken
Reality: Localhost does not need the public internet. It points to your own machine. You can lose Wi-Fi and still run a local server.
Clearing browser cache always fixes it
Cache can cause display issues, but it rarely fixes a refused connection. If no server is listening, clearing cache changes nothing.
The browser is the problem
Sometimes it is. But the real cause is more often the local server, port, firewall, Docker mapping, proxy, or hosts file.
Incognito mode gives me a clean test
Incognito removes some session data, but it does not remove your browser fingerprint, proxy routing, DNS behavior, or automation traces.
That last point matters for multi-account users and automation specialists. A browser can look clean to you but still expose signals that websites use for detection.
=> Run your setup through Pixelscan after you fix localhost. It helps reveal whether your browser fingerprint, IP, proxy, WebRTC, DNS, or bot-like signals are consistent before you use the same environment for account work.
Common Issue: “Localhost Refused to Connect” Firewall Error
“Localhost refused to connect” is one of the most common network connection errors you may encounter when trying to access your local server. This issue can happen for several reasons, such as a firewall blocking the connection, the server not running properly, or incorrect browser/network settings. In this section, we’ll look at the common causes of the “localhost refused to connect” error and the basic checks you can try to fix it.
Guide: quick troubleshooting steps
- Check the local service: Make sure your app or server is running.
- Confirm the correct port: Use the exact localhost URL shown in your terminal, such as http://localhost:3000.
- Restart the server: Stop and relaunch the local process.
- Review firewall, proxy, or VPN settings: Disable anything that may block or reroute localhost traffic.
- Check Docker, WSL, or VM networking: Make sure the required port is properly exposed.
Check browser extensions, VPNs, and proxies
If your server is running and the port is correct, look at the browser itself.
Some extensions intercept traffic. Some VPNs change DNS behavior. Some proxy managers route requests that should stay local. Some privacy tools block local network access to prevent tracking. This is useful for privacy, but it can break development. Try this:
- Open another browser with no extensions.
- Test http://127.0.0.1:PORT.
- Disable VPN or proxy temporarily.
- Test again.
- Re-enable tools one by one.
If localhost works only after disabling a proxy or privacy extension, you found the conflict.
For users managing multiple accounts, this step is important. If one profile uses a proxy, another uses a different fingerprint, and a third has automation scripts running, local testing can become misleading.
Advanced setups should keep local development, browser identity testing, and account environments separated. Tools like Multilogin can help manage separate browser profiles, while Nodemaven can support proxy workflows when stable IP quality matters. The point is not to add more tools for no reason. The point is to avoid mixing environments that should stay separate.
=> Need help managing multiple social media accounts? Browse our guides on creating multiple Binance, Douyin, Facebook accounts, and more.
Fix localhost issues in automation workflows
Automation users hit this error in a slightly different way.
You may run a local API, browser controller, webhook listener, proxy dashboard, or Selenium endpoint. Then the browser says “localhost refused to connect.”
In this case, ask one question first:
Where is the browser running?
- If the browser runs on your physical machine, localhost means your machine.
- If the browser runs inside Docker, localhost means the container.
- If the browser runs on a remote server, localhost means that remote server.
- If the browser runs in a cloud profile, localhost may not mean your laptop at all.
That is where many automation setups break. The server is running, but not in the same environment as the browser trying to access it.
Use the correct host address for your setup. In Docker, you may need host.docker.internal. On a remote server, you may need the server’s internal IP or a secure tunnel.
Before scaling automation or multi-account sessions, test the browser environment on Pixelscan. Localhost may be fixed, but your fingerprint, proxy, DNS, or bot signals may still reveal that the setup is not clean.
=> Looking for a Fake Address Generator? This guide shows how to create random addresses instantly without leaking real data.
Step-by-step checklist to fix it fast
Use this checklist when you do not know where to start.
- Confirm the local server is running.
- Open the exact URL shown in the terminal.
- Try 127.0.0.1 instead of localhost.
- Check whether the port is correct.
- Make sure another app is not using the same port.
- Disable proxy, VPN, and browser extensions temporarily.
- Check firewall or antivirus blocks.
- Verify the hosts file.
- If using Docker, confirm port mapping.
- If using automation, confirm where the browser is actually running.
This order saves time because it starts with the most common causes before moving into deeper system issues.
=> Discover the main differences between Antidetect and VPN, and see which tool is better for privacy and handling multiple profiles.=> Want to learn more about Interstellar Proxy Guide 2026? Check out this guide for working links, setup tips, and alternatives.
Conclusion
The “localhost refused to connect” error does not mean your project is broken. In most cases, it simply means your browser tried to connect to a local service, but the service did not respond correctly.
The usual fixes are straightforward: make sure the server is running, confirm the correct port, avoid proxy interference, review firewall rules, and understand whether your app is running directly on your machine, inside Docker, or in another environment.
For normal development, that may be enough. But for multi-account management, mobile workflows, automation, or privacy-focused operations, fixing localhost is only the first step. A page that loads locally does not automatically mean your wider browser or device environment is ready for real account activity.
This is where the next layer matters. Pixelscan can be used to review how your browser environment appears from the outside, including signals related to fingerprint consistency. Meanwhile, Multilogin Cloud Phone is better positioned for managing mobile-based account workflows in a cloud phone environment, rather than simply “testing” localhost or browser signals.
In short, fixing localhost means your local service can run. Using tools like Pixelscan and Multilogin Cloud Phone helps you better understand and manage the broader environment around account operations.